


We cheated a bit by using the Stampin Up Matchbox die instead of making each drawer by hand. Even doing this, it took the better part of an afternoon to make just the drawers. There are 24 of them, one for each day of Advent, with 6 of them on each side.
We'll start with a view of the whole box. I made mine in traditional greens and reds and a Santa theme. For a little intereest, I added several touches of pink. All these colors blended well together.
 Here is a shot with the drawers open.
.JPG)
These are some of the matchboxes when we first got started.

Here they are as I started to stack them on top of a 5 1/2 square chipboard base. I had covered this base with paper first. I mostly used a hot glue gun for assembly.
 I decided to add a smaller chipboard layer in between the 2 stacks for a little more stability. Since the die is a little bit bigger than the 12" size of cardstock, you go thru a lot of paper, as each sheet only made one box.
Now the box is in the process of embellishing!! Oh how I love that part!
Although the red velvet ribbon in the photo (from Martha Stewart) is beautiful, I was not happy with how it looked on top of the box, and went with a sheer wired ribbon instead.
 The top has a few layers of cardstock and designer paper, and a stamped image. Santa and his friend are colored with Copics, and I used red liquid pearls for his holly berries.
 Here is side #1. The drawers are labeled with computer generated numbers and a small wooden "hub" as they are called.
 Papers are from several different companies. Cardstock is DCWV, some from Stampin Up.
 I used little wooden stars for the spaces opposite the santas. I painted them pale pink, and then dipped them in prism glitter.

I love this image of Santa. His fur is glittered and his holly berries are also done with Liquid Pearls.
 A view of the last side of my box. I am just so pleased at how it came out!!!!!

I used the gold colored Copic here for his glasses, and Stampin Up Crystal Effects to make it look like he had lenses in those glasses. Pretty good, huh???

I love this image of Santa. His fur is glittered and his holly berries are also done with Liquid Pearls.
 A view of the last side of my box. I am just so pleased at how it came out!!!!!
I used the gold colored Copic here for his glasses, and Stampin Up Crystal Effects to make it look like he had lenses in those glasses. Pretty good, huh???
His beard is colored with pale grey Copics , but its hard to see in the photos.
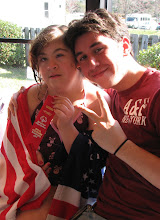
 My Daughter loves opening the boxes each day to see what candy she has gotten. A single Reeses fits perfectly ( her favorite). 4 kisses also fit, some laying down on their side.
 My Daughter loves opening the boxes each day to see what candy she has gotten. A single Reeses fits perfectly ( her favorite). 4 kisses also fit, some laying down on their side.
 M & Ms would be a good choice also.
 Many thanks for stopping by.....
 Many thanks for stopping by.....


3 comments:
BEUTIFUL!!!! My fav Santa is the one with the glasses! Hmm,might have to see if my friend will let me borrow him....! I bet we make more of these!
Of course you may borrow him!!!
Beautiful work, I love your santa theme and your traditional colour combo.
Liza x
Post a Comment